Want to learn how to become a full-timing RVer and live a life of adventure from the open road? 

Introduction

Ah, life on the open road; Or as those, we've interacted with calling it "living the dream." Freedom to roam where you want. Creating experiences that you'll remember for a lifetime. Full time RVing can be a life-changing experience... At least it was for us. 

Before heading out on your big adventure, take the time to learn from those who have lived this way before. Soak up their knowledge and use their experience as a way to keep you informed.

Over the years, and through trial and error, we've learned a list of tips and tricks that can help you make the most of your full-timing adventure, especially if you plan to work full time while you travel

Transportation

FULL-TIME RVING UNITS TO CONSIDER

When living on the road, your mode of transportation is your home and your office, part time or full time. You could be a full-time adventurer who hikes or bikes to get around, but for the purposes of this page, we are suggesting a vehicle as it has the space for setting up your mobile office, sleeping, and cooking. 

Below is an overview of transportation methods best suited for the digital nomad full-time RVer.


1. Car/SUV

Pros: 
  • Generally good on gas mileage
  • Fits within a parking space
Cons:
  • Doesn’t provide separation from work to living space (unless you have a rooftop tent)
  • Minimal headroom

Recommendation if you go this route: Consider purchasing a rooftop tent. Also, consider a vehicle that has a towing capacity of 1,500 pounds or more. This way you have the option to expand your space in the future with a small travel trailer. 

2. Camper van 

Pros: 
  • More incognito for camping (you can easily drive away from your camping spot without having to get out of your sleeping quarters).
  • Some models may offer holding tanks for water storage, electricity, and a kitchen.
  • More headroom.
  • You can expand your space with a rooftop tent (creating separation for your mobile office inside the van).
  • Ability to access living quarters while driving or parked. 
Cons:
  • Home and office are in one unit; Every time you leave your camping spot you have to pack everything up. 
  • You have to tow your home with you everywhere you go. 

Recommendation if you go this route: Choose a cargo van that has a towing capacity of at least 5,000 pounds. This will offer you more power for adventuring while also giving you the option to upgrade and pull a trailer in the future if you choose to expand your space.

3. Truck camper

Pros: 
  • Separation of work and living space (i.e. truck bed is for camper; truck cab is for working space).
  • Some models may offer a small bathroom, holding tanks for water storage, electricity, and a kitchen.
Cons:
  • While it can be a fully contained unit, it can be a bit tight to live out of. 
  • It’s not as incognito as a camper van (most truck campers are not connected to the cab, so you’ll have to get out of the camper if you need to drive away).
  • If your truck camper is too heavy, you may not be able to upgrade and tow a travel trailer in the future. 
  • You lose the truck bed as a storage space.

Recommendation if you go this route: Choose a truck with a crew or extended cab option. This way you can create a mobile office in your back seat. Additionally, choose a truck that has a towing capacity of at least 5,000 pounds. Depending on your truck, it's possible that you may be able to upgrade and tow a trailer in the future if you need to expand your space. 

Want to learn how to DIY a truck camper of your own? Check out our step-by-step project. 

4. Travel trailer

Pros: 
  • Most travel trailers are live-in ready: electricity, water, sleeping quarters, and a kitchen. Additionally, most travel trailers over 13’ offer a bathroom and shower. 
  • Able to pair with a camper van or truck camper. This way you can have complete separation of work and living space with the option to go adventuring on shorter trips without your travel trailer. 
  • Consider finding a bunkhouse model. You could convert this into an office to work from as well as a guest bedroom when you want to host a guest. 
Cons:
  • Heavier travel load equals increased expense in petrol.
  • If you have a 23’ long or more travel trailer you will not be able to fit within two vertical parking spaces. This means you’ll have to park perpendicular and take up four or more parking spaces. This makes it more difficult to venture around cities and back roads.

Recommendation if you go this route: Consider a 16’ to 23’ travel trailer with full hookup options. Additionally, choosing a travel trailer as opposed to a 5th wheel allows you to maximize your tow vehicle functionality (storage or additional living quarters).

5. Fifth-wheel

Pros: 
  • Easier to maneuver than a travel trailer.
  • More living space with a reduction in overall length with tow vehicle; There’s generally a bedroom that fits over the truck cab
Cons:
  • Need a truck with a bed to tow.
  • Reduction in the functionality of your tow vehicle; A 5th wheel hitch is in the truck bed. This means you will be unable to leverage your truck more than a tow vehicle. 

Recommendation if you go this route: Choose a fifth wheel that offers slide outs. If you’re going to lose the option to make your tow vehicle more functional, then you might as well compensate with adding a slideout to increase your living space.

6. Bus or motorhome

Pros: 
  • Increase in work and living space. 
  • Access to the cab. 
  • Easier to maneuver for people who don’t want to tow their home behind them. 
Cons:
  • Adventuring into off-grid areas and can be difficult.
  • Parking can present challenges due to size. 
  • You have to tow your home everywhere with you all the time. 

Recommendation if you go this route: Consider towing a vehicle behind you or getting an option with a toy hauler that can fit a small car. This way you don’t have to take your bus or motorhome with you everywhere you go Also, consider a shorter bus—less than 25 feet—for easier maneuverability.

Boondocking

What is boondocking? Boondocking is when you take advantage of free camping without amenities or hookups. If you plan to travel frequently, then it's likely you'll boondock at one point or another. 

In 2018, we traveled over 3,000 miles from Texas to Washington State over the course of three weeks and boondocked along the way. We loved every minute of it, especially when boondocking in Colorado and Idaho. 

Boondocking is an art. In order to live comfortably, you need to understand your unit's limitations (i.e. water and electricity). We found there are four essential tools that can help you enhance your boondocking experience. 

1. Portable solar power 

The majority of full-timing units that have solar power have it mounted to their living space. We actually recommend a mixture of portable and mounted solar. 

We recommend a portable solar solution because you're able to take it with you wherever you go. This is especially helpful if you're a remote worker who's on the move chasing a wireless signal and don't want to have to take your unit with you everywhere. 


2. Portable solar generator

Similar to the above, most full-timing units that have a battery solution have it mounted to their rig. However, having a portable battery that's light enough to carry and can be charged via solar power can be helpful around your boondocking site. 

3. External fresh water container with a spout

What happens when your freshwater tank runs dry? How do you fill it without moving your unit? A water jug can be a great way for you to store more water at your boondocking site. And if it has a spout, then it's something you can use to fill up your unit's freshwater tank. 

While boondocking through Wisconsin, it was difficult for us to find a freshwater spicket to fill our water container. However, in a nearby park we found a water fountain that Justin used to fill up our water jug to transfer water to our Airstream's

freshwater tank. Sure, it took him more than 15 trips to fill up the tank, but that's road life. 

Here's a recommendation: get a water bandit adapter for your hose. This way, if you find a threadless freshwater source you can still hook your hose up to it. 

4. External RV waster holding tank

Water conservation is a real task for the boondocker. And even if you're diligent and only use water when truly needed, you're still going to need to clean your tanks at some point. 

Do NOT dump your tanks on the ground where you're staying. It's practices like that that set a bad example for the rest of the RVing community. 

Instead, invest in an external RV wastewater holding tank. This way you can clean your tanks at your boondocking site, and transport your waste to a proper dump station. 

Sleeping

Ah, the life of the full-time RVer. Unless you're retired, you'll need to make a living. And maybe you don’t want to spend the majority of your money on campgrounds every night and don’t mind the small risk to save some dough. 

Below is a list of tips on how to successfully sleep covertly (and free) while traveling.

1. Equip yourself with helpful apps.

From Walmart parking lots that allow overnight camping to free Bureau of Land Management camping, there are many helpful apps that can help you navigate your search. The best part about these apps is other nomads like yourself have left reviews and suggestions so you’re not starting your research from scratch.
 
Here is a list of helpful apps to consider:
  • RV Parky app (Cost: Free). RV Parky maps campgrounds, state parks, Walmarts, Cabelas, Cracker Barrels, rest stops, and travel centers in any area. We mainly use it for quick overnight stays at Walmart's. And based on user reviews, you can see if it’s a safe place to spend the night. Welcome to road life! Typically unless there is a city ordinance against it, a 24-hour Walmart will not have a problem with you staying a night or two in their lot (on the garden side usually). It’s polite to ask customer service and to buy something, but not always necessary. 
  • Freecampsites.net (Cost: Free). The value of this app is that it shows any type of free campsite available across the United States. 
  • AllStays app (Cost: Paid – under $10). Similar to RV Parky, All Stays is more robust. It also maps Bureau of Land Management land, which is mainly located out west and is free to camp on for up to 14 days.
  • Ultimate Campgrounds app (Cost: Paid – under $10). You can use the web application for free. We’ve used UC for finding out of the ordinary campgrounds, like fairgrounds and county parks. 

2. Consider enrolling in a camping subscription pass. 

If you're the type of travel that wants to travel while still having creature comforts like full hookups and a community, then consider enrolling in a campaign subscription. Here are a few options to choose from:

  • Thousand Trails (Cost: $599/ year). Thousand Trails offers over 190 campgrounds across the United States. You can stay up to two weeks at any campsite before moving on to the next. 
  • Harvest Hosts (Cost: $79/ year). What better way to travel than to stay at a place where you can unwind with a beer or wine—that's the value Harvest Hosts provides. They even offer a golfing option (if that's something you're in to).
  • Good Sam (Cost: $29/ year). Good Sam is a discount leader when it comes to planning your travel. Think of them as a Travelocity for RVers. 

3. If you’re in a bind, sleep in a nearby neighborhood.

Only do this as a last resort. If you’re in an area where campgrounds are full and there’s no overnight parking allowed in parking lots, then find a quiet neighborhood to get some shut-eye. Be respectful, though. Pull in late (after it appears people have gone to bed) and leave early in the morning before the sun comes up.

Let’s talk about covert sleeping. It is what we call a cozy thrill. You are in a parking lot, but your home is all set up, maybe a candle is lit, it’s warm, and you fall asleep in your own bed. Here are some experiences we’ve had with different endings.

We visited Yellowstone National Park in 2017. Up to that point, we had not needed to prebook campgrounds. All of the campgrounds in Yellowstone were booked up for the night. The park is huge and we wanted to be close enough to Lamar Valley to see animals early in the morning. We drove into Gardiner, Montana right outside of the park on the upper west side. We parked, had dinner, walked around, and when it got dark, pulled onto a quiet side street to sleep. We were very quiet, not using many lights, and woke up around 5 a.m. to drive back into the park.

In 2018, we were driving the coast of Florida and needed to stay the night in Boca Raton. The Walmart did not allow overnighters and the Planet Fitness parking lot was too small. Trying to be as respectful as possible, we pulled down a neighborhood road to a dead end with no houses, just a turn around. We thought we parked out of sight. All things considered, we did make it till 6 a.m. (it was still completely dark) when we heard cops outside reading our license plate. We jumped into action (which is really hard to do from a dead sleep), opened the door, and explained why we were there. They were nice enough, obviously asking us to leave, but did not give us any trouble otherwise.

We’ve also gotten kicked out of a Walmart around 12 a.m. when we first started full-timing. We had not checked any apps or even checked the hours of the Walmart—they closed at midnight. Sometimes you’re just going to have to take a risk. The manager of each Walmart, Planet Fitness, Cracker Barrel, truck stop, etc. we overnight at has the right to ask us to leave, but we always try to be as respectful as we can and rarely have trouble. Park far away from the entrance and if you are nervous, ask the manager or customer service if they would mind if you stayed one night. Explaining you’re a patron always helps, too.

Eating

Your health is of utmost importance while traveling. When lacking routine, it is easy to make your health low on the list of priorities. But you should be feeding your body well in order to be at the top of your game. We’ re big advocates of clean eating because it makes us more energized and ready to take on anything the day brings. This lifestyle takes a lot of energy and spontaneity. If you are not mindful about what you are eating, it will be difficult to sustain. It is important to have a well-stocked pantry, some easy go-to recipes, and to know how to healthily (and inexpensively) eat out.

Below is a list of tips on how to develop good eating habits while traveling.

1. Have an efficient cooking process.

Whether you’re traveling in a camper, a van, or just living out of your car, get a small propane stove, a frying pan, and a pot. One-pot/pan meals are your friend; less clean up!
 

The nice thing about traveling is the ability to get fresh groceries every couple of days, especially if you don’t have a fridge. We highly recommend getting a Yeti cooler. If you don’t have a fridge or if you need some extra space, these coolers keep food fridge-level cool and ice stays frozen for about seven days. Fresh veggies and eggs are a staple in our diet, but we have a few non-perishable go-tos we keep in our cabinets. Here are ten things to always keep in your dry pantry.

  1. Quinoa or rice: Easy base for veggies, meats, and sauces! 
  2. Coconut milk: Swap this for water when cooking quinoa for some healthy fats and added richness and flavor. It’s also a great way to liven up stir-fried meat and veggies.
  3. Canned chicken or tuna: Easy way to always have protein on hand. Add to salads, make tuna melts, you know the drill.
  4. Pasta sauce: We’re a spaghetti-at-least-twice-per-week family. Perhaps you are, too. We try to buy sauces with basic, organic ingredients and no added sugar. Being diabetic, Ariele uses spaghetti squash or zucchini instead of pasta, avoiding blood sugar spikes.
  5. Larabars and Quest bars: Traveling means you won’t always have time to fix a meal. These are great snacks or meal replacements if necessary.
  6. Almonds, other nuts, or trail mix: In a small space, you are likely working right next to or in your kitchen. If you get bored hungry like us, have healthy snacks on hand, okay.
  7. Tortillas: They are versatile and last a while. We opt for high fiber tortillas as they prevent a blood sugar (and therefore energy) spike and subsequent crash.
  8. Single packet condiments: No refrigeration needed and you can often pick up a bunch at the next fast food restaurant or grocery store visit.
  9. Peanut or almond butter: Another go-to snack option or quick lunch. Add to apples, celery, or a classic peanut butter and jelly sandwich.
  10. A few of your favorites herbs and spices: You’ll be a lot more likely to want to cook if your food isn’t bland! Trader Joe’s has good quality, inexpensive herbs and spices. 
Our go-to meal: Coconut Milk Quinoa with Veggies.
 

For this recipe, you will need one burner and one medium-sized pot.

Ingredients:

  • 1/2c uncooked quinoa
  • 1c coconut milk or light coconut milk
  • 1-2 tbsp olive oil
  • 1 ½ c chopped vegetables. For example:
    • zucchini
    • yellow squash
    • red bell pepper
    • broccoli
    • spinach
  • Salt and pepper to taste
  • Any other herb or spice, curry powder is nice!

Method:

  1. Heat olive oil in a pot over medium heat.
  2. Saute vegetables until soft, covering with a lid and stirring often.
  3. Transfer cooked vegetables to bowl and cover to keep warm.
  4. Add quinoa and coconut milk to pot and heat to a boil.
  5. Once boiling, turn to low, cover and let simmer for 15 minutes, stirring occasionally.
  6. Combine vegetables with quinoa.
  7. Add salt, pepper, and other spices to taste.

3. When you eat out, eat out effectively.

Whenever you go out, try to plan it into your schedule. It’s a great opportunity to charge your devices, get free wifi to do some work, and find a place to sit and enjoy new scenery. 

We love Subway, Panera, and any quick place with seating. They are generally inexpensive, healthy, offer a variety of options, and have free wifi and outlets for multitasking. When eating out occasionally, treat yourself! But just try to get some veggies in.
 
Also, check to see if your place offers condiments in packets. This way you can stock your pantry—making the most of your visit. 

Budget

No matter your income or how you’re making money, it’s smart to track your spending. The last thing you want is to be surprised when you go to fuel up at a gas station and can’t go anywhere. It also helps to keep your spending prioritized. You will come to learn that you have a different set of expenses as a full-time RVer. 

Here is a list of tips on creating and managing a budget while traveling.

1. Determine your net income.

You’ve probably heard the saying, “don’t live above your means.” That’s an important mantra for the full-time RVer. Remember, you’re not on vacation. In order to keep this lifestyle sustainable, you need to understand your financial situation.

2. Create a budget sheet and track your expenses.

Create goals and be diligent about tracking what you spend to make sure you manage your budget appropriately.

We use a simple Google Sheet to track our monthly usage. Here is a blank template for you. We break it out into two categories.

  1. Monthly recurring expenses like a gym membership, Airstream payment, Netflix, AAA, etc. 
  2. Monthly category allocations like going out, shopping, etc. We enter each purchase in the budget sheet, which keeps our spending on track for the month, and also because we use credit cards for everything to accrue reward points. This system averages us about $150-$200/month in cashback from reward points. 

3. Build in a savings budget.

Even though you are living a life with more spontaneity, you will be happy you built up your savings down the road, even if you are always a wanderer.

4. Build in a traveling budget.

Life on the road is unknown. You never know when an expense will come up that was unforeseen especially when it comes to car repair. 

5. Document your receipts.

If you are traveling for work, chances are you can deduct a lot of your expenses from your taxes at the end of the year. Get into the practice of taking pictures of all of your receipts for campgrounds, groceries, restaurants, gas stations, and maintenance bills.

6. Get a credit card with rewards.

You might as well be earning money or other rewards every time you make a purchase. There are many credit cards that offer reward programs. For this to work, you need to make pay off your credit card balance frequently, like once per week. This way you will avoid interest fees.

If you're looking for a credit card, then we recommend the Amazon Prime Rewards Visa Signature Card. This card gets you 5% cashback on all Amazon purchases and 2% cashback on gas stations and restaurants.


digital nomad guide

Self-care

Finding and keeping an efficient, healthy self-care routine is vital to a sustainable life as a full-time RVer. Some semblance of routine in a spontaneous life could mean the difference between you trying the life out for a few months and it becoming a long-term lifestyle. It is easier to have a routine when you know what to expect. But, of course, that is a big reason why you are exploring the life of a full-time RVer—to break the monotony. 

Self-care is whatever helps you stay centered and mindful. It will help you approach any unexpected situation with grace and allows you (yes, you will now allow yourself) to enjoy every moment—every truck stop, back road, parking lot, hawk sighting, campsite set up routine, roadside wildflowers, and fellow traveler interaction. 

Here is a list of tips on how to create a mindful self-care routine while traveling. Remember, we are all a constant work in progress!

1. Build ten minutes into your morning (or evening, or both).

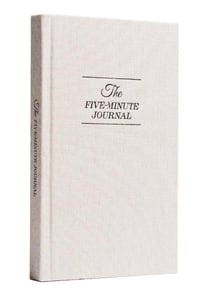
Before you open your computer or turn on your phone, take five minutes for reflection in a journal and five minutes to meditate.

  • Journaling right when you wake up allows you to set the tone for your day. We highly recommend The Five Minute Journal. Filled out morning and evening, The Five Minute Journal prompts you to list gratitudes and affirmations, creating a lovely habit of positivity and transformation. 

five-minute-journal

  • Meditation does not have to be intimidating. There is no pressure to “clear your mind.” Just try to be present and focus on your breaths. There are a number of meditation apps that can guide you through relaxation if you need a bit more structure.

Here is how each of us practices meditation. 

We are both different, but still are able to become more centered, present, and calm.

Ariele’s method: Usually performed in the morning after having a cup of coffee. Sit in an upright position (so you don’t fall asleep), close your eyes, take a few centering deep breaths, and return to your regular breathing pace. Just focus on air going in and out of your lungs. If you have a thought, recognize it and let it pass, always coming back to focus on your breath. Imagine a white light surrounding you, kind of like a safe zone. A mantra can help keep unwanted thoughts at bay. A favorite of Ariele’s is “I am love, I am light.”

Justin’s method: Usually performed first thing in the morning and last thing at night – M.D. Andrew Weil’s 4:7:8 (relaxing breath) exercise. As Weil describes it: 

  • “Exhale completely through your mouth, making a whoosh sound.
  • Close your mouth and inhale quietly through your nose to a mental count of four.
  • Hold your breath for a count of seven.
  • Exhale completely through your mouth, making a whoosh sound to a count of eight.
  • This is one breath. Now inhale again and repeat the cycle three more times for a total of four breaths.”

2. Call a loved one or friend once per week.

Half of Wild We Wander does not enjoy talking on the phone, but yearns for more connection with her loved ones. She always feels more energized and happy after a good conversation with family or friends. So, even if it’s just for a quick check in, make it a point to call or connect with someone once per week. This is especially important if you spend the majority of your time on your own or in more remote places.

3. Remember your physical self-care.

We’ve touched on this, but prime physical health makes it so you are at the top of your game as a full-time RVer. The following tips may sound simple, but are sometimes hard to remember to do everyday. We are a fan of the post-it note reminder around your abode.

  • Join a gym with many locations so you can workout, stretch, practice yoga, and get a nice shower whenever you can. If this isn’t for you, go on a walk every day. It’s a great way to explore your current surroundings.
  • Eat vegetables everyday. 
  • Drink a lot of water. 
  • Take short breaks from work every couple of hours or so.
  • Invest in a few nice skincare products (ladies and gentlemen, alike!). Wear sunscreen. Keep some in your vehicle, gym bag, backpack, and anywhere you might forget to put it on.
  • Get plenty of sleep. Half of Wild We Wander does not sleep very well, but he’s always making an effort to improve. 
  • Find a multivitamin that works for you (we use Ritual).
  • Shut down early. Shut down your screens at least an hour before you close your eyes to sleep. We try to shut down at least an hour prior to sleeping and read, talk, play cards, or journal.

4. Practice patience—stuff happens.

Even if you're a routined, organized person stuff happens. Be patient with yourself (and those you travel with). When something happens, make an effort to keep a positive disposition and react once you have thought through the situation. This will take practice. 

We woke up from a night of boondocking in a Walmart parking lot. We stopped and had breakfast at an IHOP before traveling up route 1 in California. 

Before I got into our truck I noticed there was water coming out from the side of the Airstream (and it wasn't near the water tank). I thought maybe something had spilled inside our Airstream so I opened the door to check things out. 

When I opened the door I saw the kitchen faucet on and the sink was covered with a cutting board... I realized the water pump had been left on during travel and somehow the sink turned on in transit.

Our 25 gallon fresh water tank was unloading on the floor. Everything was soaked. 

We could have yelled. We could have been upset. We could have blamed each other. Instead we hugged each other, gathered our things, and dealt with the situation.

When you travel, stuff will happen. Expect it. You can't control that, but you can control how you react to a situation.